Flex Queries
To import trades you need to create 1 or 2 flex queries, the 2nd flex query is only required if you plan to use the auto sync functionality.
Query 1 - Cash Transactions & Trades
1. Log into the Interactive Brokers website, go to the 'Reports' page and 'Flex Queries' menu item.
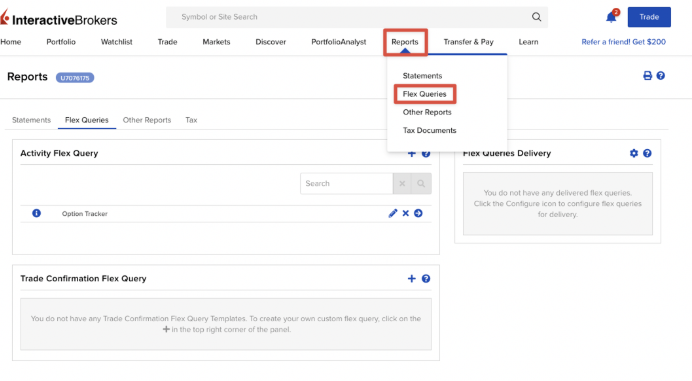
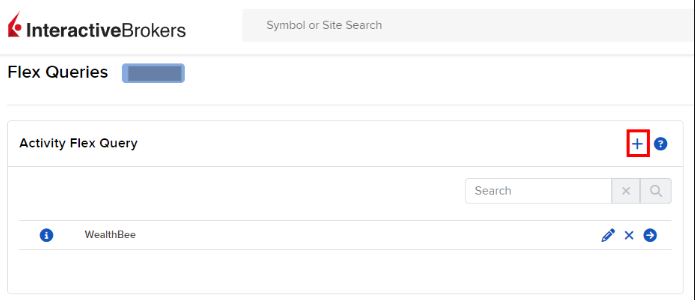
2. Click the + to the right of 'Activity Flex Query'
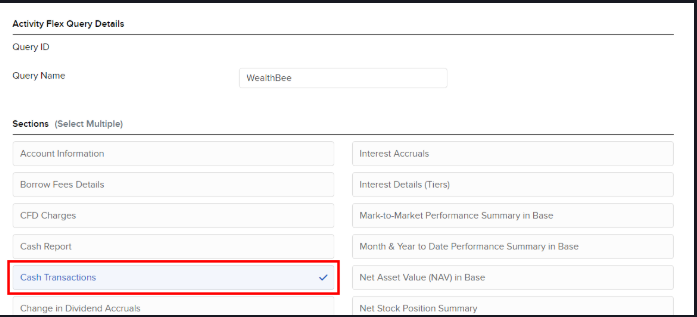
3. Give it a “Query Name” and click on “Cash Transactions” in the Sections list
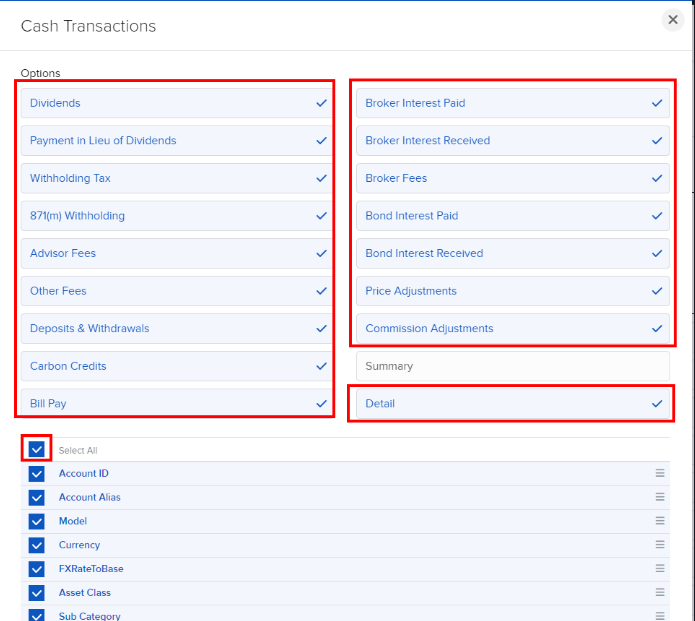
4. Select all groups except Summary and then select all fields via the Select All checkbox, then click Save
5. Next click on “Trades” in the Sections list
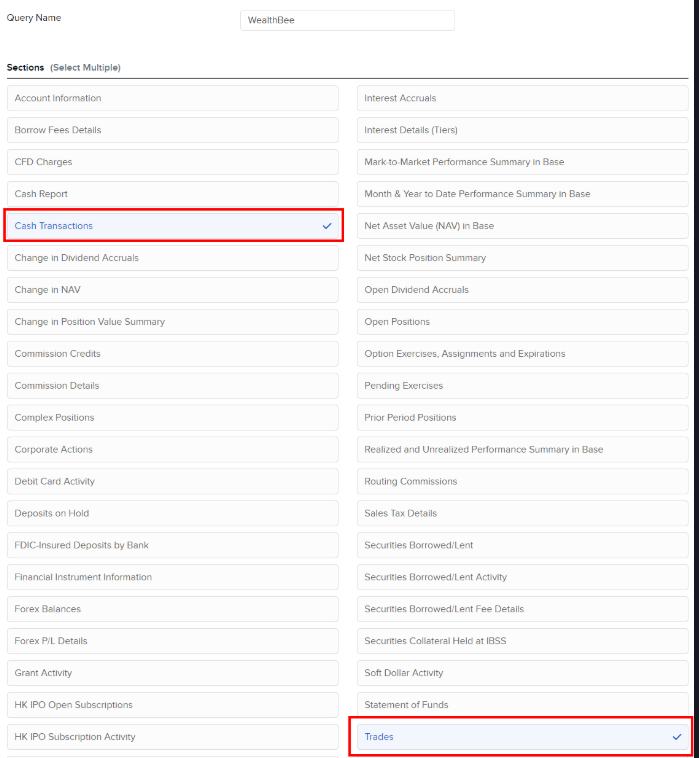
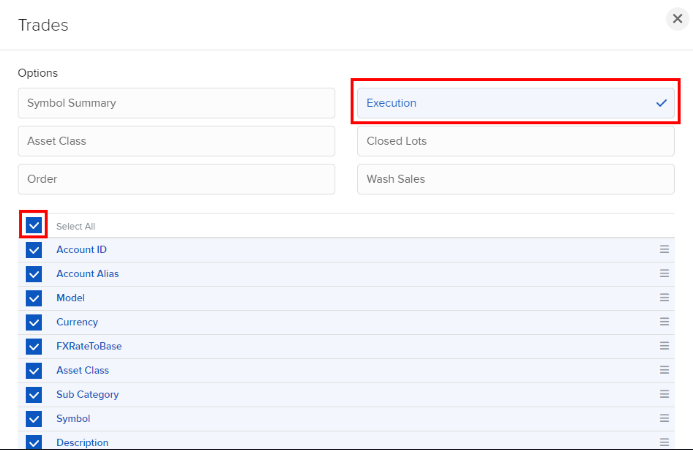
6. Select "Execution" and the select all fields via the Select All checkbox, then click Save
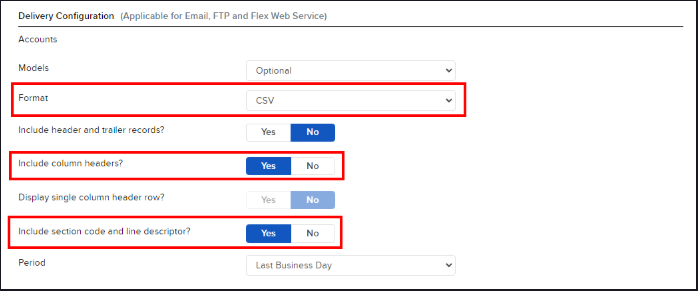
7. In the list of headings select under 'Delivery Configuration': Change Format to CSV and ensure the 'Include column headers' and 'Include section code and line descriptor' box is checked
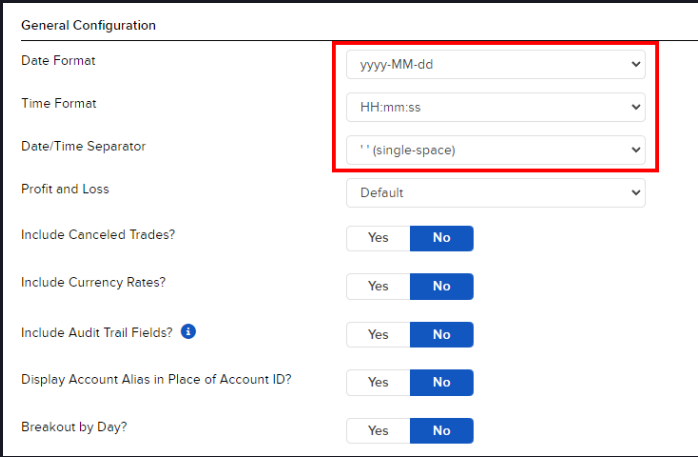
8. Under 'General Configuration' make sure all toggles are set to 'No' and the date and time formats match the following: 'yyyy-MM-dd' and 'HH:mm:ss' and a single space between the date
9. Click 'Continue' and then 'Save Changes' on the next page.
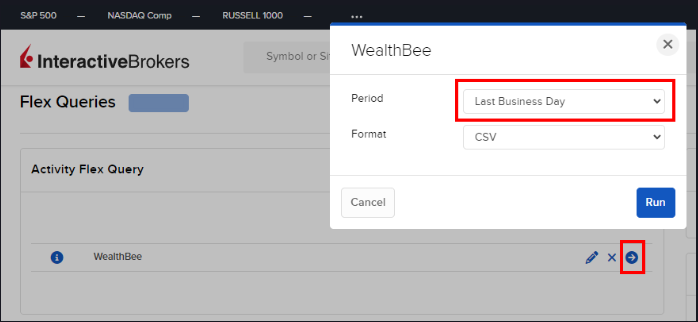
10. Go back to the ‘Flex queries’ page and click on the right arrow and then click run selecting the Period you want.
Query 2 - Trade Confirmations
Perform the same steps above but in the sections part choose

Auto Sync Configuration
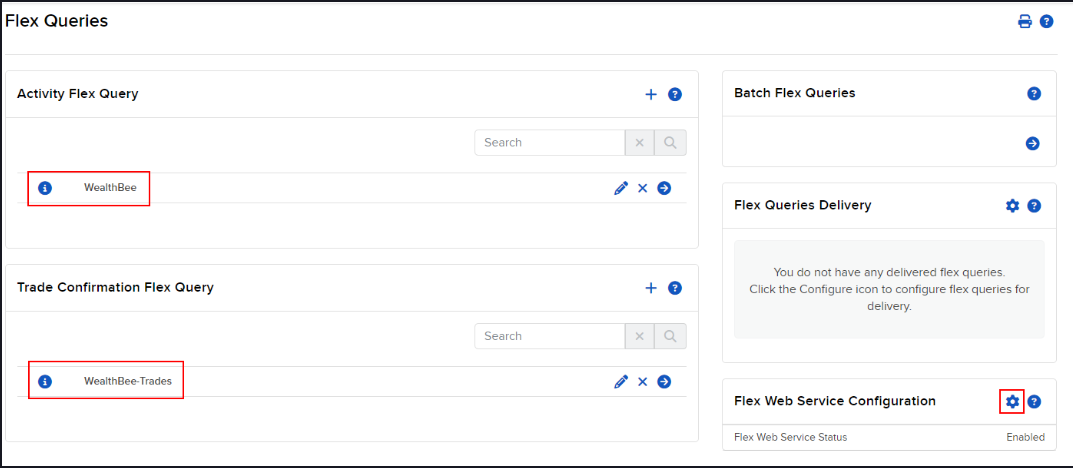
1. Log into the Interactive Brokers website, go to the 'Reports' page and 'Flex Queries' menu item. You should have setup both queries, if not see the instructions on our add assets page (next to the settings on the top right of the screen). Afterwards, click the COG icon to the right of 'Flex Web Service Configuration' shown below in the screenshot at the bottom right.
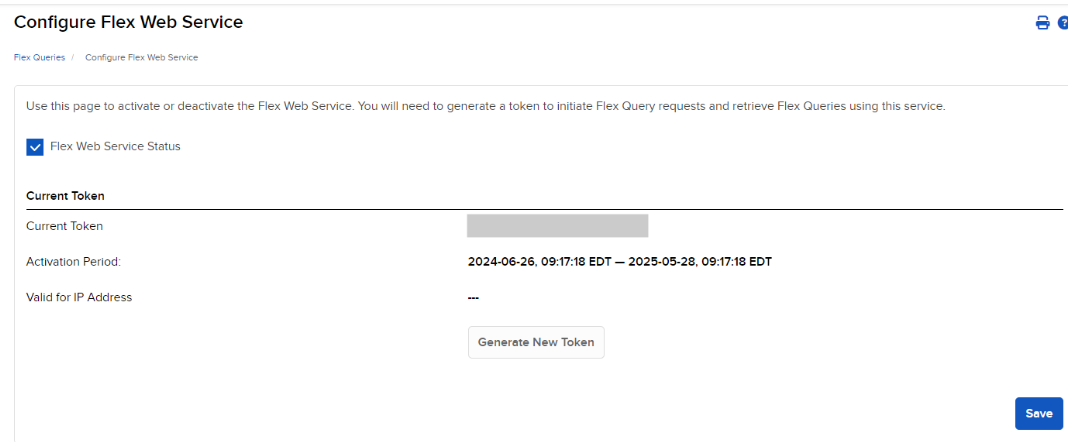
2. Generate a token and paste in the "Token" box at the top of this window, for period choose 1 year.
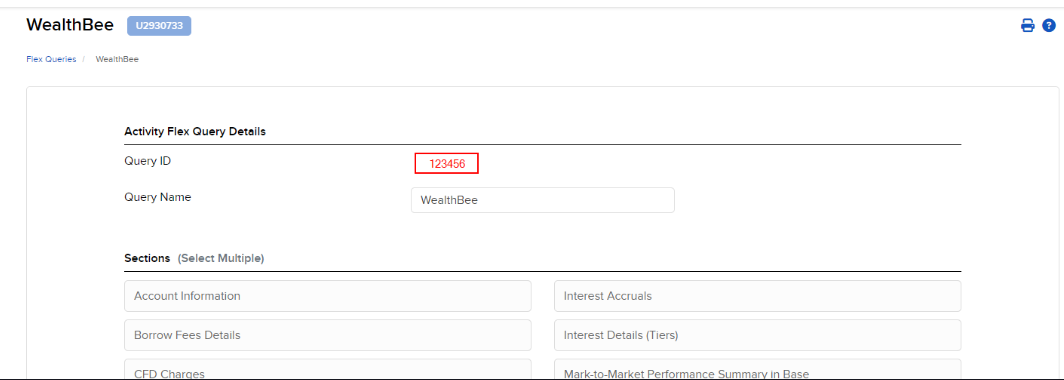
3. For each report "Activity Flex Query" (Trades & Cashflows Query Id) and the "Trade Confirmation Flex Query" (Trade Confirmations Query Id) you need to add the query id to the appropriate boxes at the top of this window.
4. You can click test to validate you've connected correctly. Save the configuration and you are done.